This post contains affiliate links. Please see our disclosure policy.

Roasting a turkey, whether it’s for Thanksgiving or just because you like turkey, can be a bit daunting. That is why I put together this ultimate guide to roasting a turkey so you can make sure it turns out perfectly golden and moist.
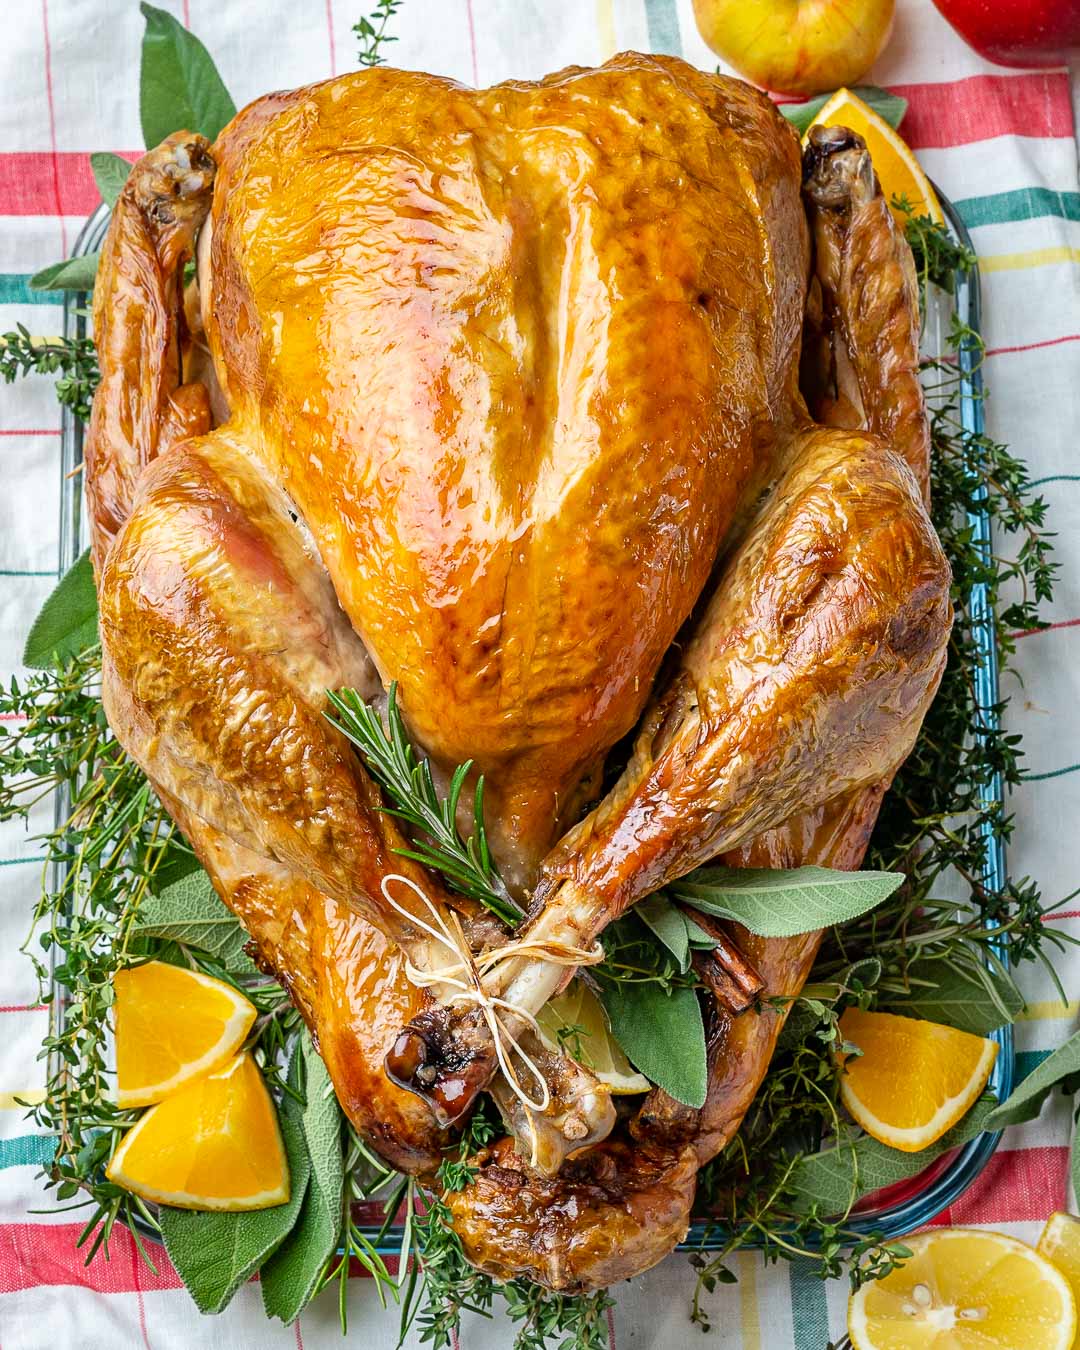
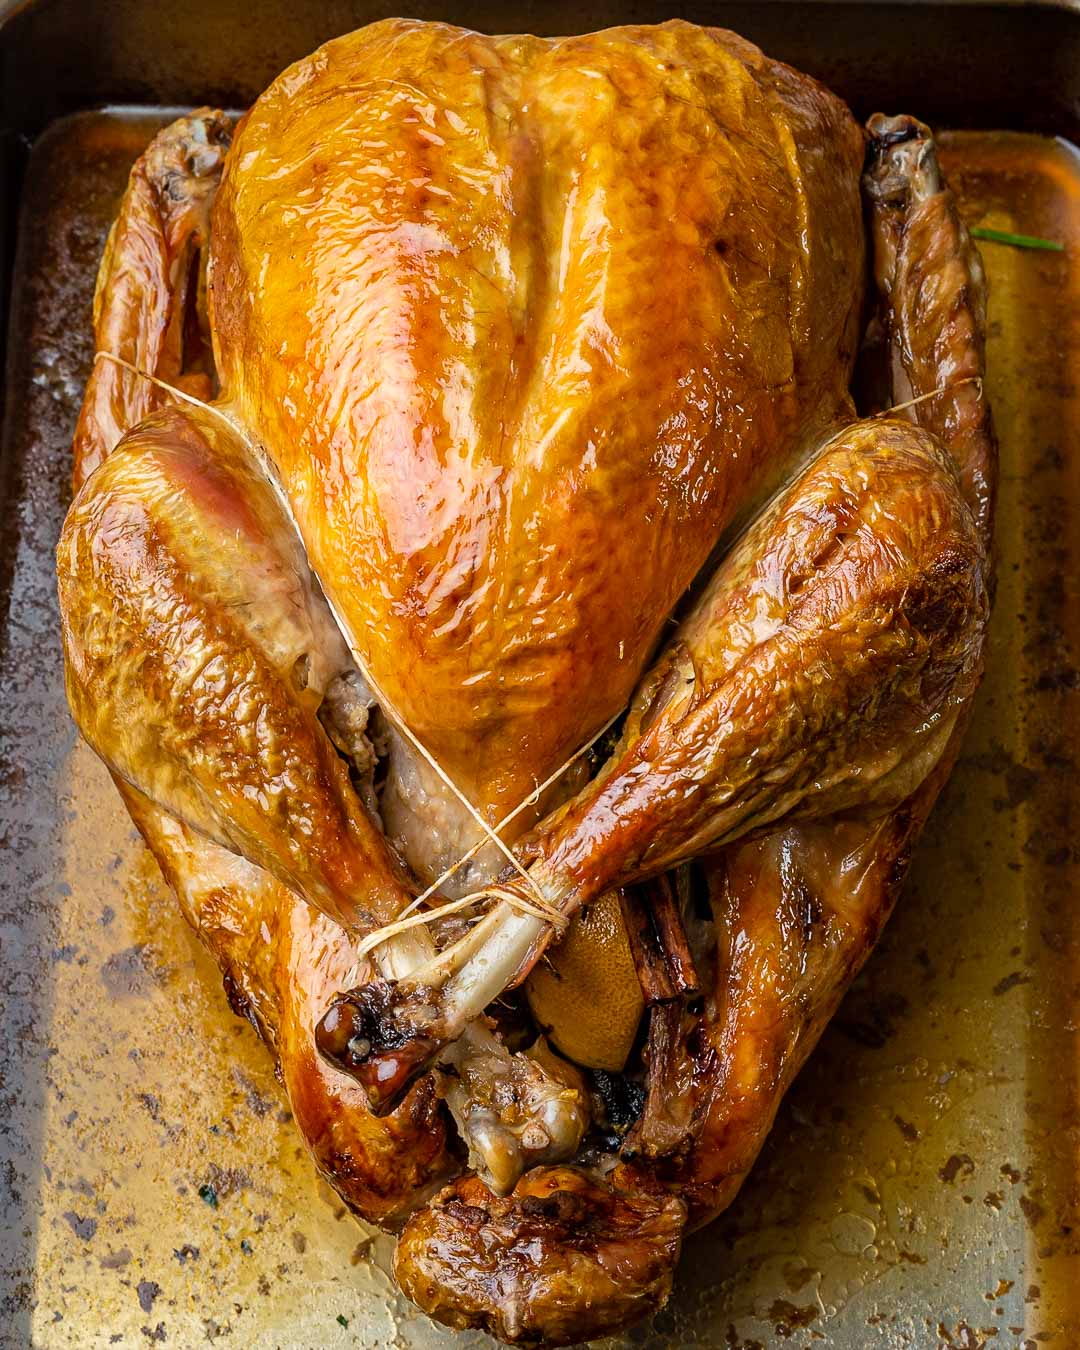
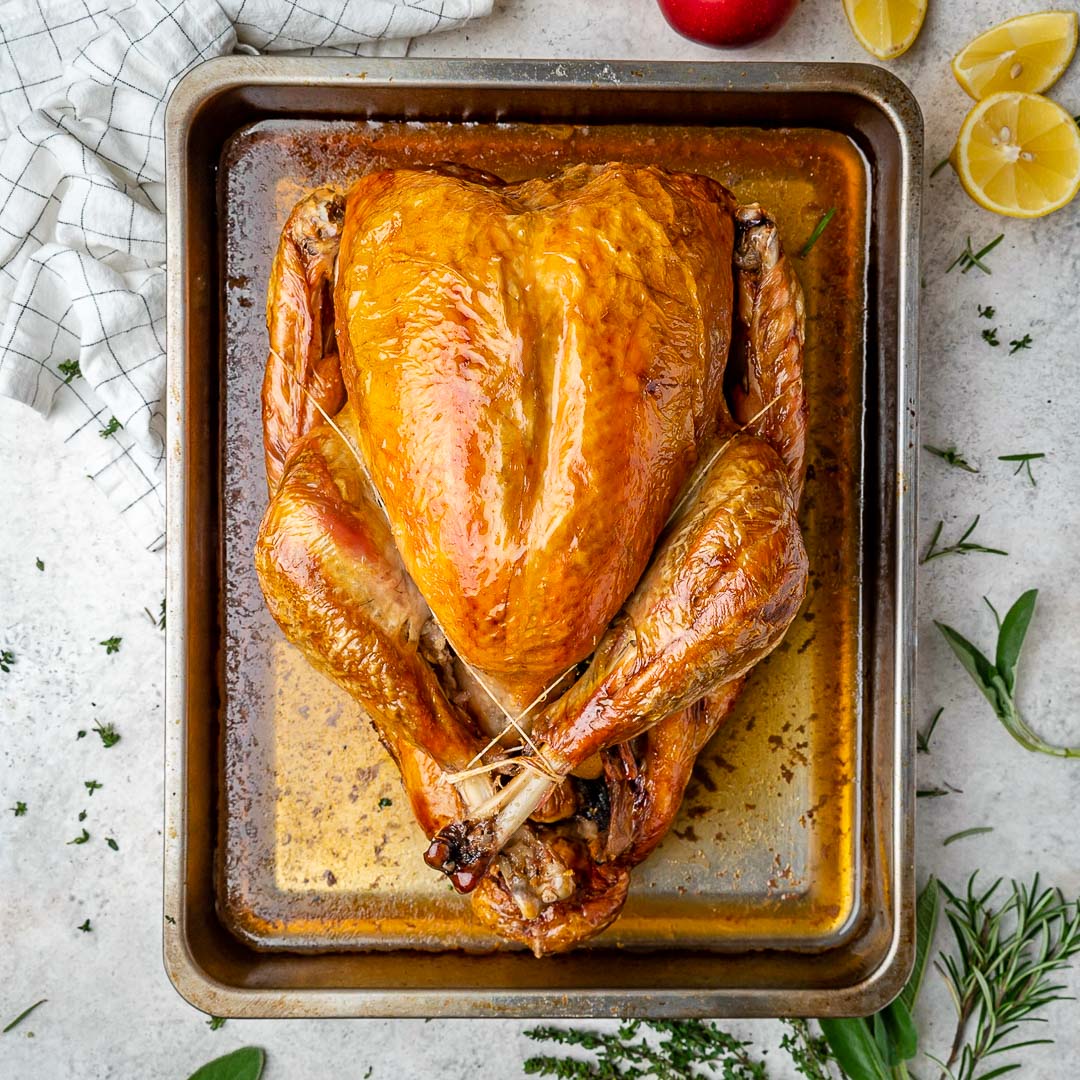
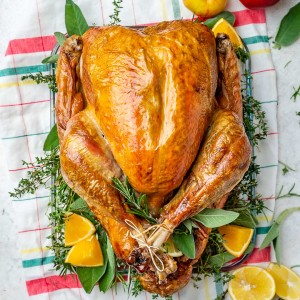
Rachel’s GORGEOUS Roasted Turkey
After roasting well over a hundred turkeys in my lifetime (we have a very large family) for Thanksgiving, Christmas, and occasionally *just because* throughout the year, I’ve learned a lot of techniques that I’ve wanted to get into the website here to share with you.
The reason I’ve put it off for so many years is that I have A LOT of tips for roasting a turkey which means this is a very long post – not short and sweet like my usual. Maybe I’m slightly (or overly) passionate about a beautifully golden-brown & perfectly juicy turkey cooked to perfection then delightfully presented to loved ones throughout the holidays. I REALLY LOVE a good turkey!
Use this as your HOW TO GUIDE for THE BEST Roasted Turkey!
Please read through this entire post and recipe instructions several times before heading out to purchase your ingredients, as there are quite a few important steps that will need to be completed ahead of time.
This roast turkey pairs perfectly with our Scalloped Sweet Potatoes, Crispy Smashed Potatoes, and Wild Rice + Sausage Stuffing.
WHY BRINE YOUR TURKEY?
➡️Because it’s truly the BEST WAY TO PREPARE A TURKEY!
➡️ The salt in the brine helps the Turkey skin roast to a beautiful crispy golden brown.
➡️ Brining seasons your Turkey all the way through the meat, for incredible flavor.
➡️ Brining creates a moist, tender, and plump Turkey.
This is especially important if you’re using a pasture-raised turkey from a local farm since they are not pre-brined like conventional store-bought turkey. Often conventional turkeys are filled with a strange soy-vegetable solution that you may want to avoid by purchasing your turkey from a local farmer.
First, you’ll need a large cooler or a 5-gallon bucket that has been cleaned and rinsed out really well.
Second, you completely submerge your turkey in the brine you created and cover it with ice. Your turkey can stay in there a few days as long as you make sure there’s always plenty of ice. This time of year is very cold outside here in SLC (usually around freezing temps) so I keep the cooler outside on my patio.
This is awesome because it also frees up valuable fridge space for side dishes and pies the days leading up to Thanksgiving.
Third, once you’re finished brining your turkey simply spray out your cooler (or bucket) in the tub or outside with a hose.
Last, disinfect, dry, and you’re finished with that project.
Some other holiday recipes you can prep ahead are Homemade Cranberry Sauce, Zesty Purple Cabbage Slaw, and Clean Eating Turkey Gravy.
How To Make Your Turkey Brine:
- Pour 1 gallon of vegetable stock into a large stockpot. Bring to a boil then turn off the heat. Stir in your salt until completely dissolved. Allow it to cool for 20 minutes (should still be warm at this point) then add in the maple syrup, and remaining brine ingredients. Stir or whisk really well to dissolve the salt and syrup again if necessary. Allow brine to completely cool. Keep refrigerated until ready to use.
- Add cold brine to your clean cooler or bucket, then lower your turkey in the brine. Add additional water to make sure the brine covers the turkey entirely. This is important.
- For a turkey 15 pounds or under, brine for 24 – 36 hours. For a turkey larger than 15 pounds, brine for up to 3 days.
- Keep your brine cold, checking it every 4-6 hours and adding more ice if needed.
- Before you roast your turkey, take it out of the brine water and place it on a rack to dry.
- Use paper towels to pat the turkey completely dry if needed.
- For the best results, allow the turkey to completely dry. This may take an hour or so.
- Rub your turkey skin all over with clarified butter or ghee. This creates that beautiful golden exterior. Roast the turkey at a low temperature for 13 minutes per pound.
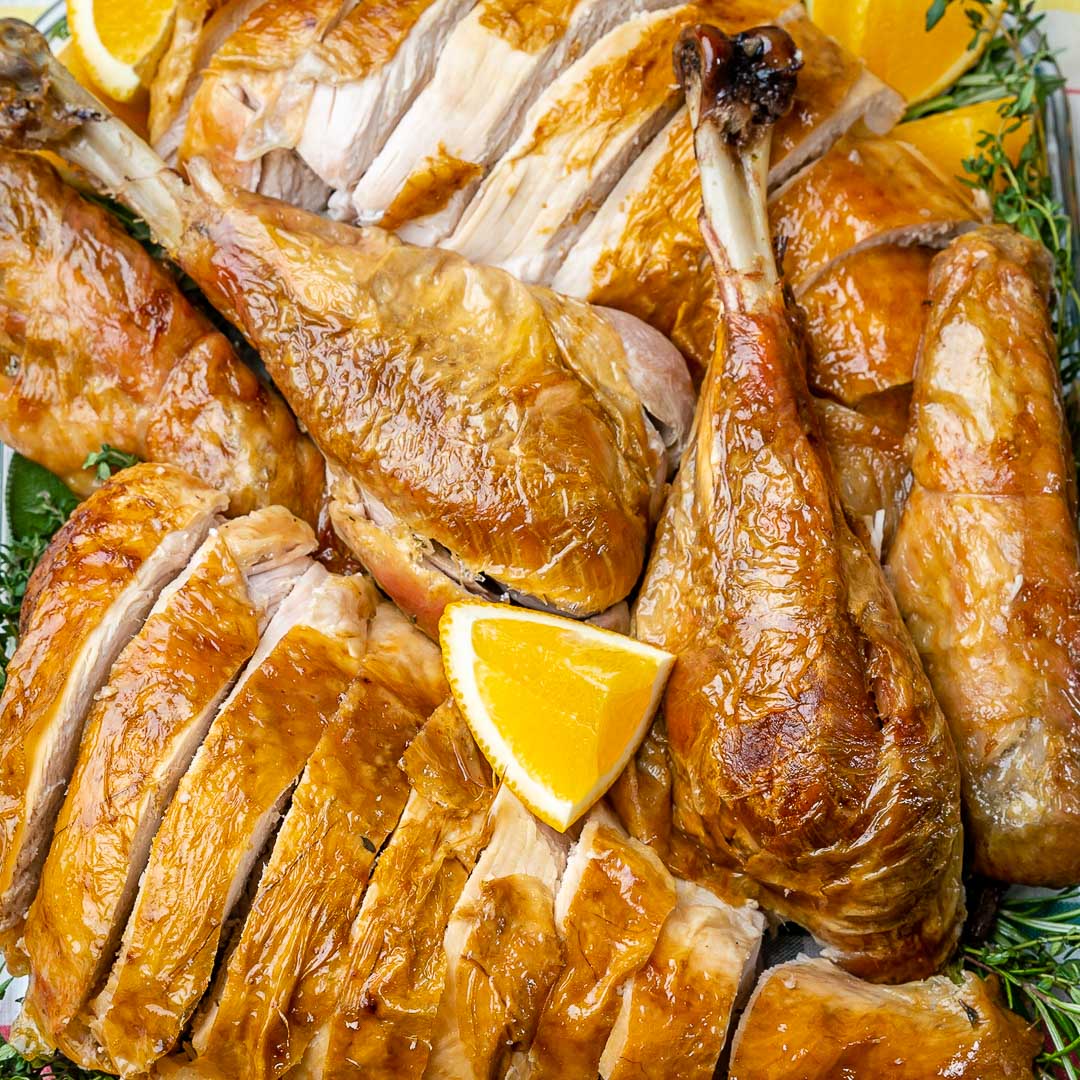
CARVING A TURKEY: STEP-BY-STEP
Step One:
After you’ve pulled your perfectly roasted turkey from the oven, let it rest for a good 30 minutes. This allows the juices to redistribute throughout, which means a juicier turkey.
Step Two:
Slice off the legs and thighs. To do this, you’ll need to slice through the skin between the leg and the breast.
Pull back on the leg, laying it flat outward, then push up on the joint from underneath. Use your knife to cut around the joint and remove the leg and thigh completely from the bird. Repeat on the other side and set these pieces aside.
Step Tree:
Remove the breasts. Slice down the side of the breast bone. Gently pull the breasts outward, continuing to slice down and outward until the breast is removed. Repeat on the other side and set the breasts aside.
Step Four:
Remove the wings. Gently pull the wings away from the turkey and slice through the joint to remove them. Set the wings aside.
Step Five:
Separate the drumsticks from the thighs. Flip it over to find the natural separation between the drumstick and the thigh. Slice through and gently pull back on the drumstick to find the joint, then slice through it. We want two separate pieces, the drumstick, and the thigh.
Using your knife, remove as much meat as possible from the thigh bone.
Step Six:
Slice all of your meat into individual serving sizes. ALWAYS slice against the grain to keep the meat tender. I like to try my best to keep the skin attached to each piece.
Don’t want to make and carve a turkey? Try one of these other holiday main dishes instead like Roasted Spatchcock Chicken, Easy Honey Mustard Pork Tenderloin, or Creamy Chicken + Broccoli Casserole.
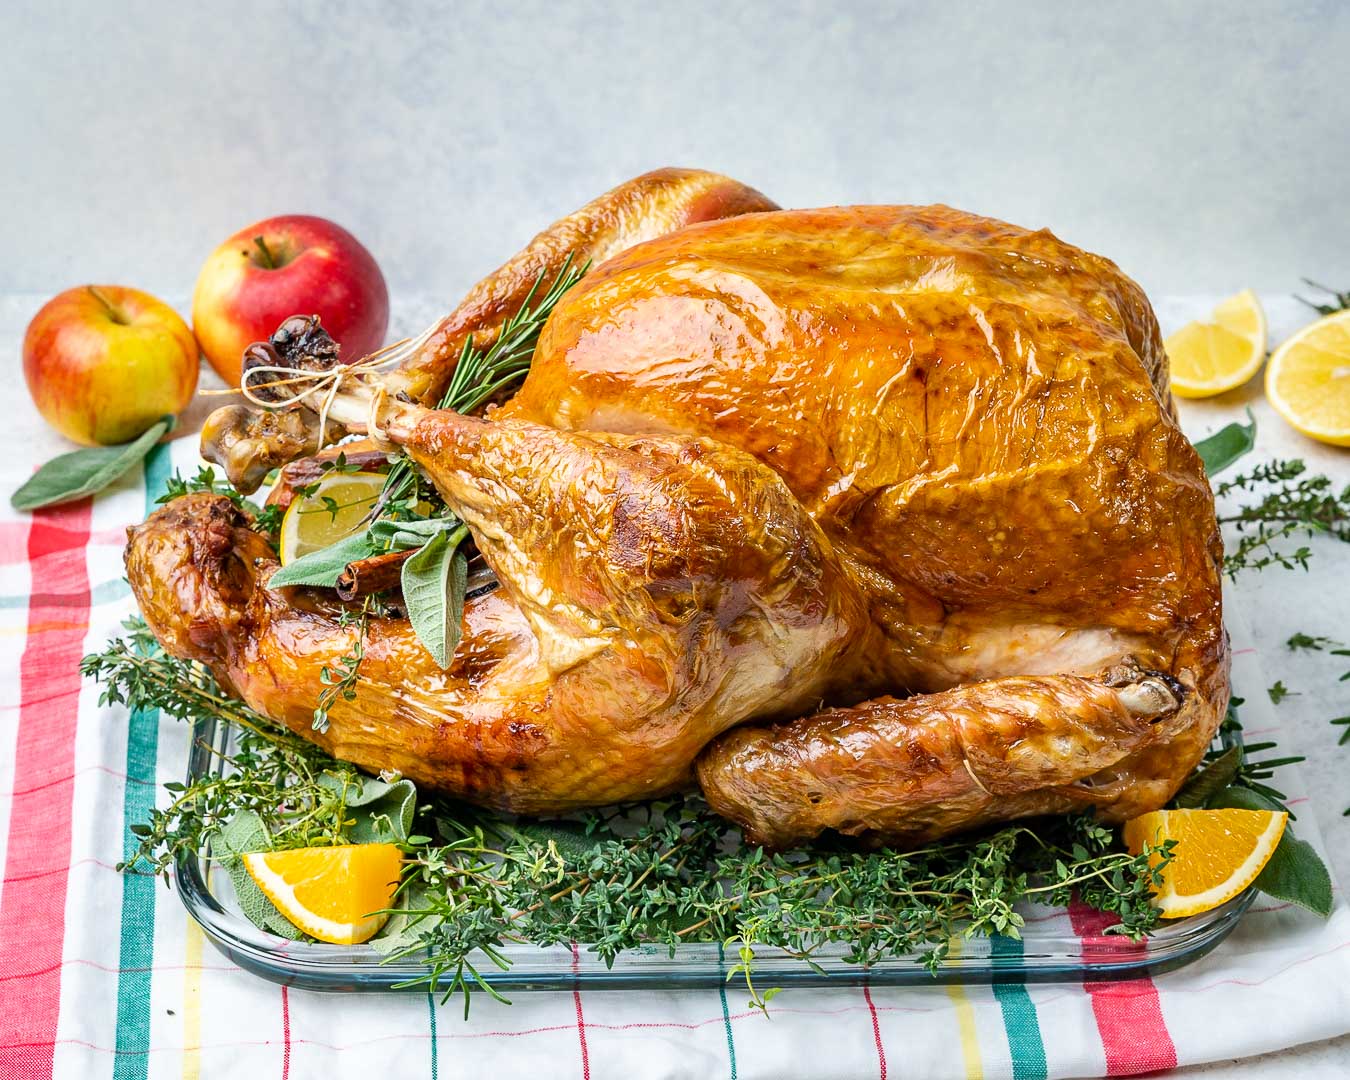
PLATING A GORGEOUS HOLIDAY BIRD:
Once your turkey is beautifully sliced, you’ll want to arrange it on a platter. Have fun with this part! Use your creativity. Hopefully, these photos inspire you but feel free to use garnishes such as fresh herbs, oranges, lemons, cranberries, apples, pears, etc.
We arranged our platter so that the beautiful golden pieces, like the breasts, are in the center. Then fill it around with garnishes.
SERVE YOUR TURKEY IMMEDIATELY:
Everything else should be cooked and already sitting on the table by the time you carve your bird. Just be sure to save the middle spot on the table for the beautiful bird you’re about to present.
As soon as the meat and bones are removed from the turkey it will cool down and dry out very quickly. So make sure all your other Thanksgiving dishes are already on the table and your guests are seated and ready to enjoy.
Here’s How To Make Homemade Ghee.
Ingredients:
- 12-14 lbs fresh or frozen young turkey
Brine:
- 1 cup sea salt
- 1 cup pure maple syrup
- 2 Tbsps whole black peppercorns
- 6 fresh cloves garlic, crushed
- 2 tsp whole cloves
- 1 tsp ground ginger
- 1-gallon vegetable stock
- water and ice as needed
- small handful of fresh rosemary and thyme
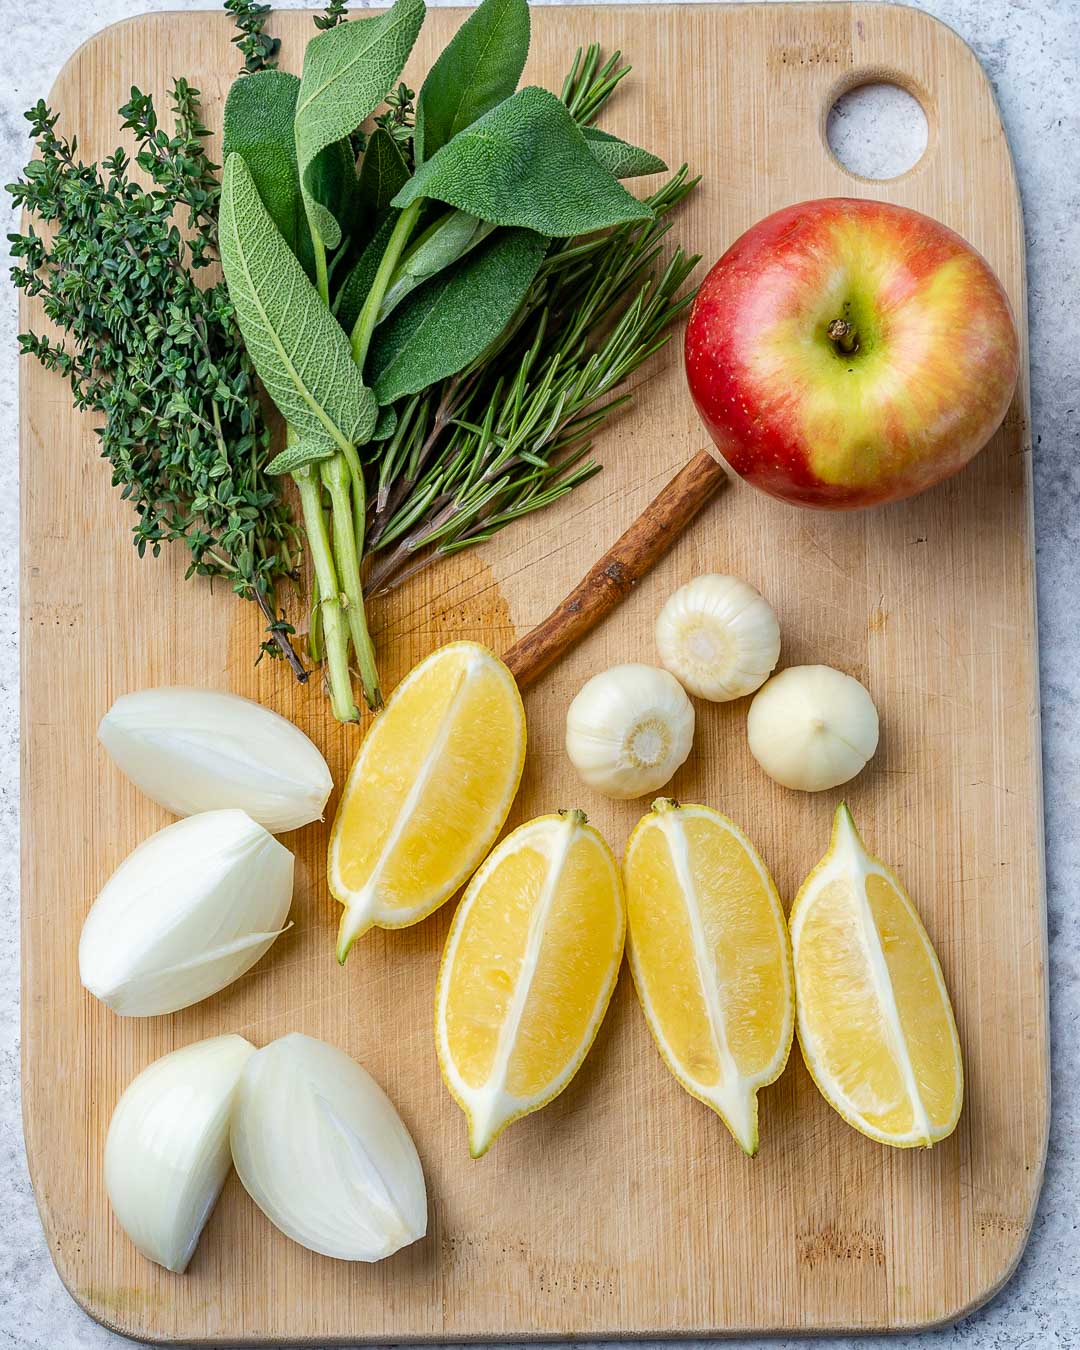
For Roasting:
- Ghee or clarified butter
- Extra virgin olive oil, or Avocado oil
- 1 large apple, quartered
- 1 onion, quartered
- 1 lemon, cut into wedges
- 2 sprigs rosemary
- 6 sage leaves
- 4 sprigs of fresh thyme
- 3 cloves garlic
- 1 cinnamon stick
To Garnish:
- additional fresh herbs, lemon, orange, apple, or pear wedges, fresh cranberries, fresh pomegranate, etc
Instructions:
➡️ To defrost your turkey:
If your turkey is frozen, begin the defrosting process about 4 days before cooking. Place the turkey in the refrigerator to thaw safely.
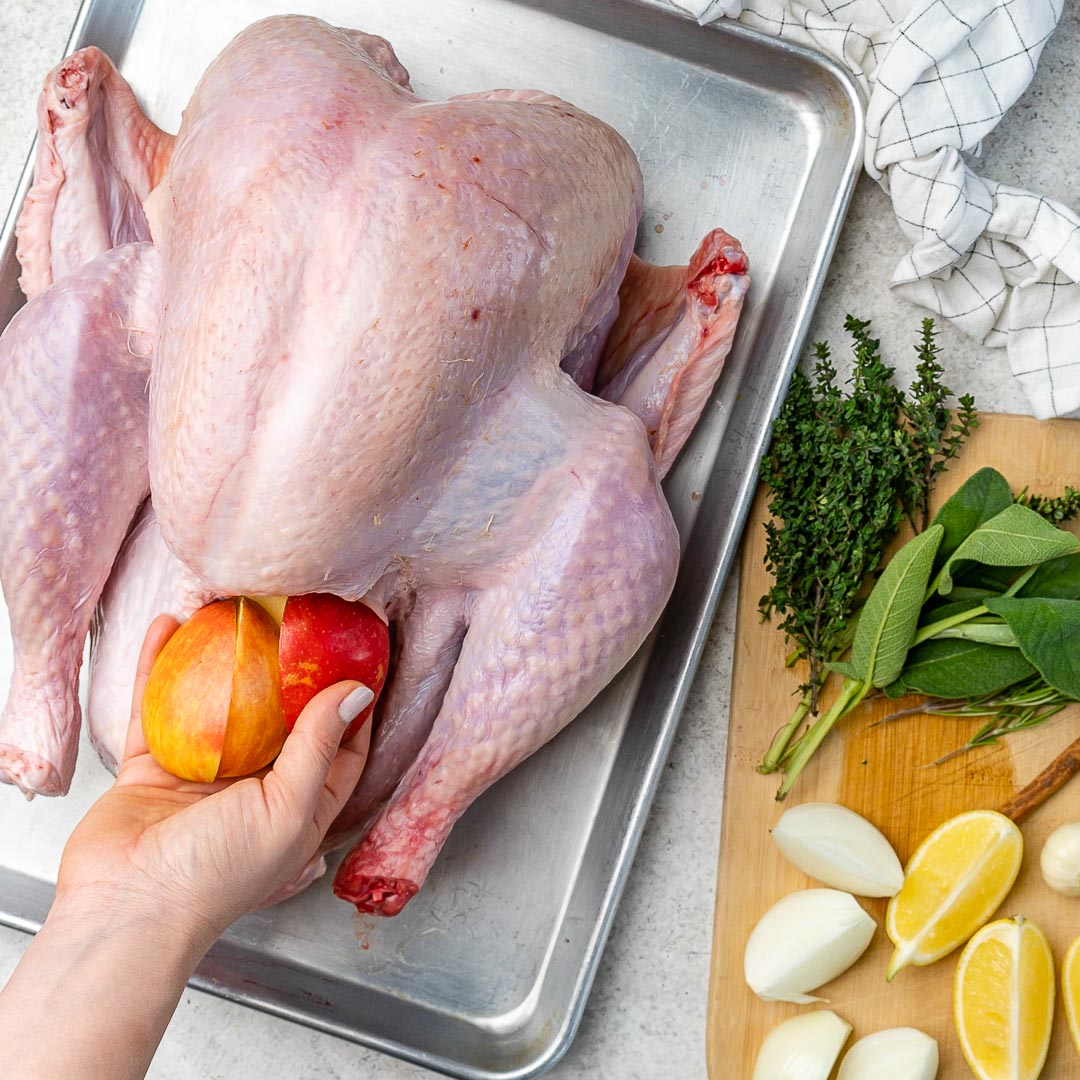
➡️Prep the turkey:
Remove the giblets bag and neck of the turkey and keep refrigerated if planning to use later for gravy or broth.
Wash the insides and pat dry all over with paper towels before brining.
Prepare your Turkey Brine and allow your Turkey to Brine. Full Brining Directions above in this post.
➡️To Roast Your Turkey:
Position your oven rack in the bottom third of your oven.
Preheat your oven to 450 degrees f.
Remove your turkey from brine and thoroughly pat dry with paper towels. Allow to fully dry as explained completely in the full brining process found above in this post.
Stuff your bird with the sliced apple, onion, lemon, garlic, cinnamon stick, and fresh herbs.
Place the bird in a large roasting pan, breast up, and truss the legs together with kitchen string as shown.
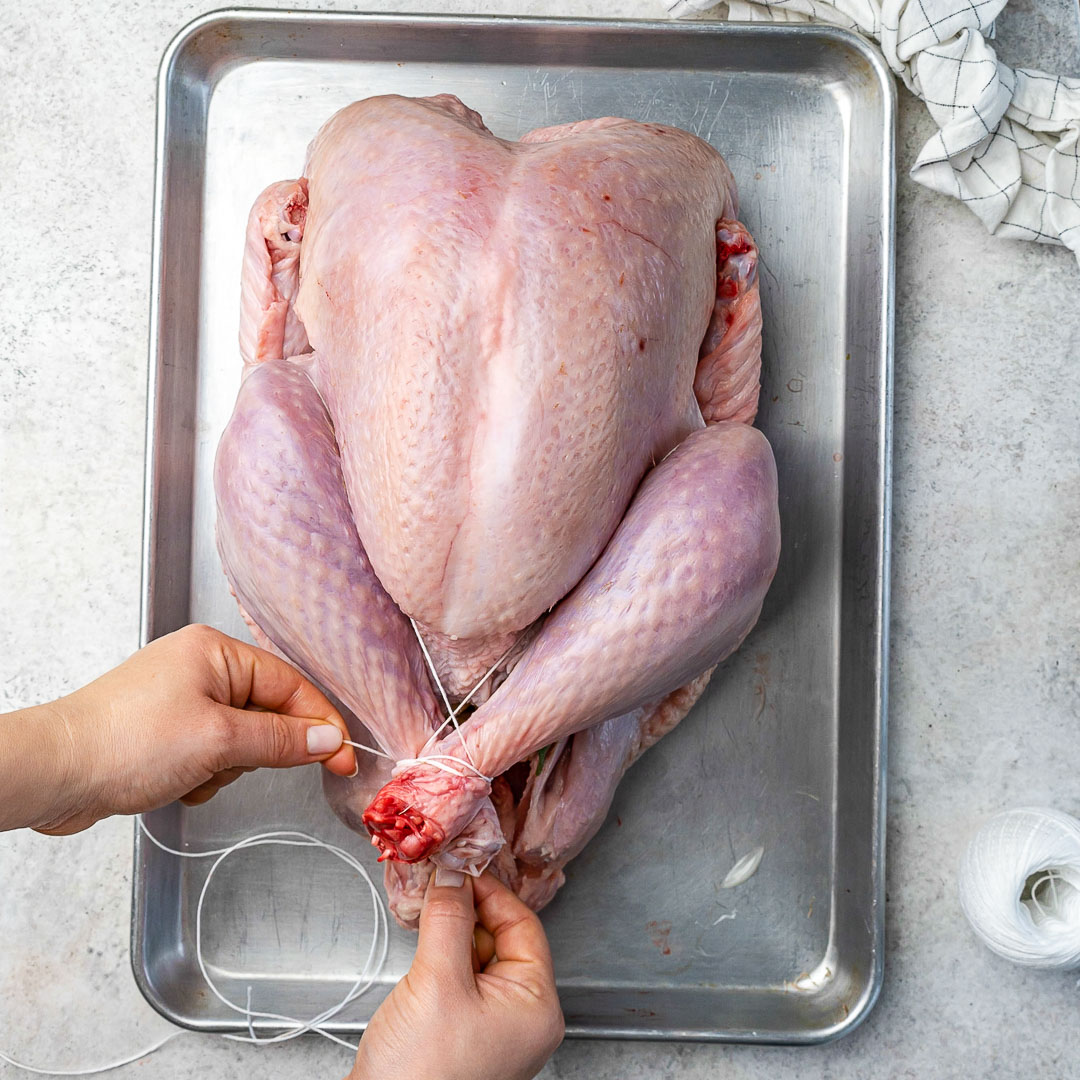
Rub the brined turkey all over with clarified butter or ghee, or rub with oil, then tuck the wing tips under the bird.

Transfer your roasting pan with the bird to your preheated oven and TURN DOWN THE HEAT to 350 degrees f.
Roast for 13 minutes per pound, or until a thermometer shows 165 degrees f. in the breast and inside thigh. Start checking the temperature with a good thermometer an hour before you think it will be done to gauge how fast it’s cooking. We don’t want to overcook or undercook our turkey.
Make sure you rotate the roasting pan several times throughout its roasting, as some parts of the oven are usually hotter than others.
Shield your turkey with foil during the last hour if it’s getting too brown.
While you rotate your pan, baste your turkey with a turkey baster or spoon. Drizzle the pan liquid onto the top of your turkey several times.
You can brush your turkey with oil during the last half an hour of roasting time to help the skin crisp up.
Once your turkey is done, remove it from the oven and allow it to rest for at least 30 minutes before carving. While your turkey is resting is an excellent time to make your turkey gravy using the drippings.
Once your turkey has had time to rest, follow our perfect carving instructions found above in this post.
Transfer to a large platter and decorate with your choice of garnish as desired.
Enjoy immediately!
❤Rachel
Need some healthy holiday dessert ideas? Try our Crustless Pumpkin Pie, Festive Pumpkin Pie Tarts, or Cranberry Apple Crisp.

More Holiday Recipes You’ll Love:
- Christmas-Morning Cranberry Spread
- Dairy-free Chocolate Tart (a Healthy Holiday Dessert)
- Easy Buddha Bowls Made with Thanksgiving Leftovers
- Cranberry Turkey Meatballs Made in the Air Fryer
- Christmas Morning Breakfast Recipes
Rachel’s GORGEOUS Roasted Turkey
Ingredients
- 12-14 lbs fresh or frozen young turkey
Brine:
- 1 cup sea salt
- 1 cup pure maple syrup
- 2 Tbsps whole black peppercorns
- 6 fresh cloves garlic, crushed
- 2 tsp whole cloves
- 1 tsp ground ginger
- 1- gallon vegetable stock
- water and ice as needed
- small handful of fresh rosemary and thyme
For Roasting:
- Ghee or clarified butter
- Extra virgin olive oil, or Avocado oil
- 1 large apple, quartered
- 1 onion, quartered
- 1 lemon, cut into wedges
- 2 sprigs rosemary
- 6 sage leaves
- 4 sprigs of fresh thyme
- 3 cloves garlic
- 1 cinnamon stick
To Garnish:
- additional fresh herbs, lemon, orange, apple, or pear wedges, fresh cranberries, fresh pomegranate, etc
Instructions
To defrost your turkey:
- If your turkey is frozen, begin the defrosting process about 4 days before cooking. Place the turkey in the refrigerator to thaw safely.
Prep the turkey:
- Remove the giblets bag and neck of the turkey and keep refrigerated if planning to use later for gravy or broth. Wash the insides and pat dry all over with paper towels before brining.
- Prepare your Turkey Brine and allow your Turkey to Brine. Full Brining Directions above in this post.
To Roast Your Turkey:
- Position your oven rack in the bottom third of your oven.
- Preheat your oven to 450 degrees f.
- Remove your turkey from brine and thoroughly pat dry with paper towels. Allow to fully dry as explained completely in the full brining process found above in this post.
- Stuff your bird with the sliced apple, onion, lemon, garlic, cinnamon stick, and fresh herbs.
- Place the bird in a large roasting pan, breast up, and truss the legs together with kitchen string as shown.
- Rub the brined turkey all over with clarified butter or ghee, or rub with oil, then tuck the wing tips under the bird.
- Transfer your roasting pan with the bird to your preheated oven and TURN DOWN THE HEAT to 350 degrees f.
- Roast for 13 minutes per pound, or until a thermometer shows 165 degrees f. in the breast and inside thigh. Start checking the temperature with a good thermometer an hour before you think it will be done to gauge how fast it’s cooking. We don’t want to overcook or undercook our turkey.
- Make sure you rotate the roasting pan several times throughout its roasting, as some parts of the oven are usually hotter than others.
- Shield your turkey with foil during the last hour if it’s getting too brown.
- While you rotate your pan, baste your turkey with a turkey baster or spoon. Drizzle the pan liquid onto the top of your turkey several times.
- You can brush your turkey with oil during the last half an hour of roasting time to help the skin crisp up.
- Once your turkey is done, remove it from the oven and allow it to rest for at least 30 minutes before carving. While your turkey is resting is an excellent time to make your turkey gravy using the drippings.
- Once your turkey has had time to rest, follow our perfect carving instructions found above in this post.
- Transfer to a large platter and decorate with your choice of garnish as desired.
- Enjoy immediately!
Nutrition
Nutrition information is automatically calculated, so should only be used as an approximation.